HOW TO MAKE A DIY ZEN GARDEN IN YOUR BACKYARD
Zen gardens are very low maintenance, and great to build in your backyard. Since they’re mostly made using stone and gravel, they are perfect for a dry area. In this post, I will show you how to make a zen garden, step-by-step.
I have an area in my backyard that hardly gets any water. It’s up against the house where it’s protected from most rainfall, and gets full sun all day long.
Plus, since it’s in a corner by the house, it gets very hot – so it’s a really tough spot for most garden plants to grow.
The inspiration for my DIY zen garden (the solution to my hot, dry, sunny corner) came on a trip to California.
I saw a beautiful succulent garden that inspired me, and I knew it would be perfect in my trouble spot. That’s how the idea for my succulent zen garden was born.
WHAT’S A ZEN GARDEN?
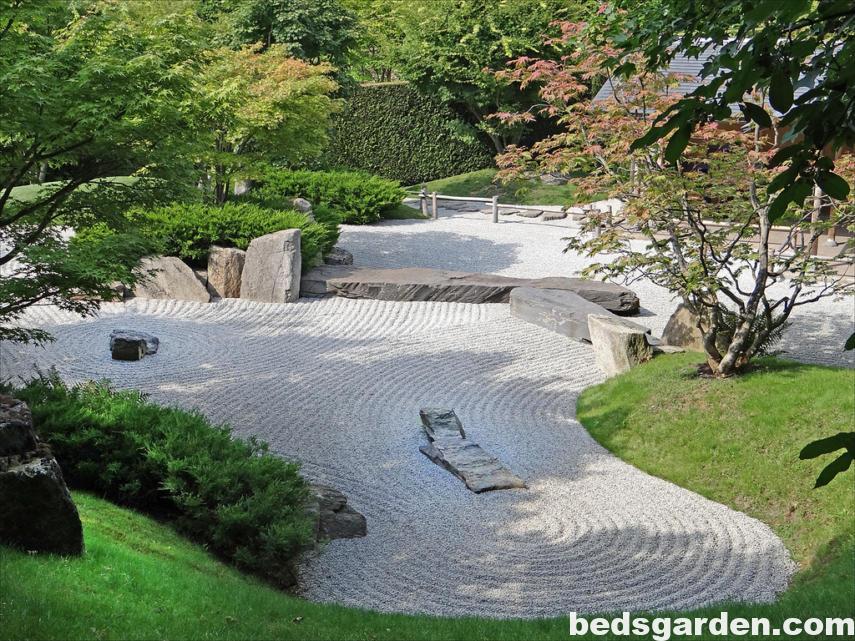
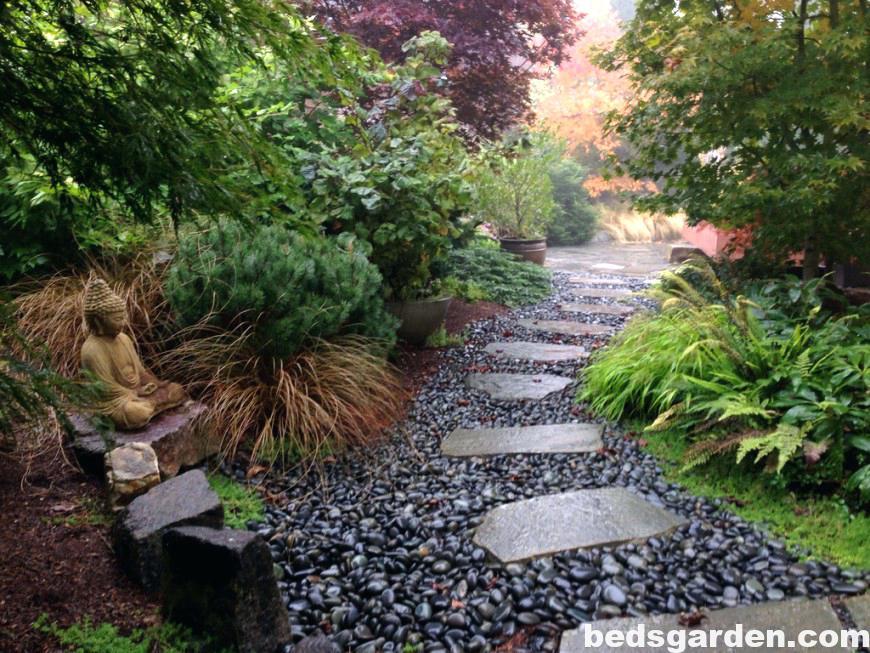
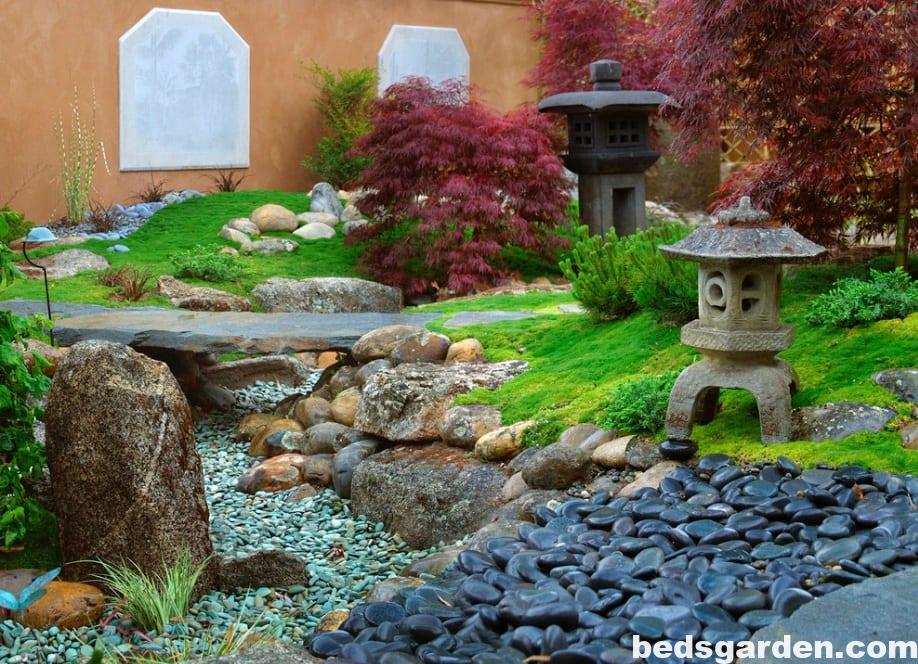
A zen garden, also known as a Japanese rock garden, is a calming space designed to represent a mini landscape.
Traditionally they are built using rocks and boulders to represent land and mountains, and gravel which is raked in patterns that create the illusion of water.
Many are made using rock and gravel alone, and don’t contain any plants or water. Plants are an optional part of the design, and using little or none is the key is to keeping it simple and low maintenance.
Originally Japanese rock gardens were created as large outdoor spaces. But these days they can be any size – from an entire backyard, to a mini zen garden sitting on your desk.
WHAT IS A ZEN GARDEN USED FOR?
Zen gardens are meant to be used for meditation and contemplation. As I already mentioned, gravel is traditionally added, and then raked in ways that represent flowing water.
The act of raking patterns into the gravel is soothing, and aids in meditation and relaxation.
You could also incorporate a space where you can sit to meditate, or build yours next to a relaxing sitting area. But that’s not necessary for a zen garden design.
HOW TO BUILD A ZEN GARDEN
Several years ago, I planted some bushes in the future home of my zen garden. But once they matured, they took over the small space, making it look weedy and overgrown. Ugly right?
After relocating the bushes to a more suitable location (don’t worry, no shrubs were hurt or destroyed for this project), it really opened up the space. It was the perfect size for a small zen garden, and I couldn’t wait to get started.
WHAT YOU NEED FOR MAKING A ZEN GARDEN
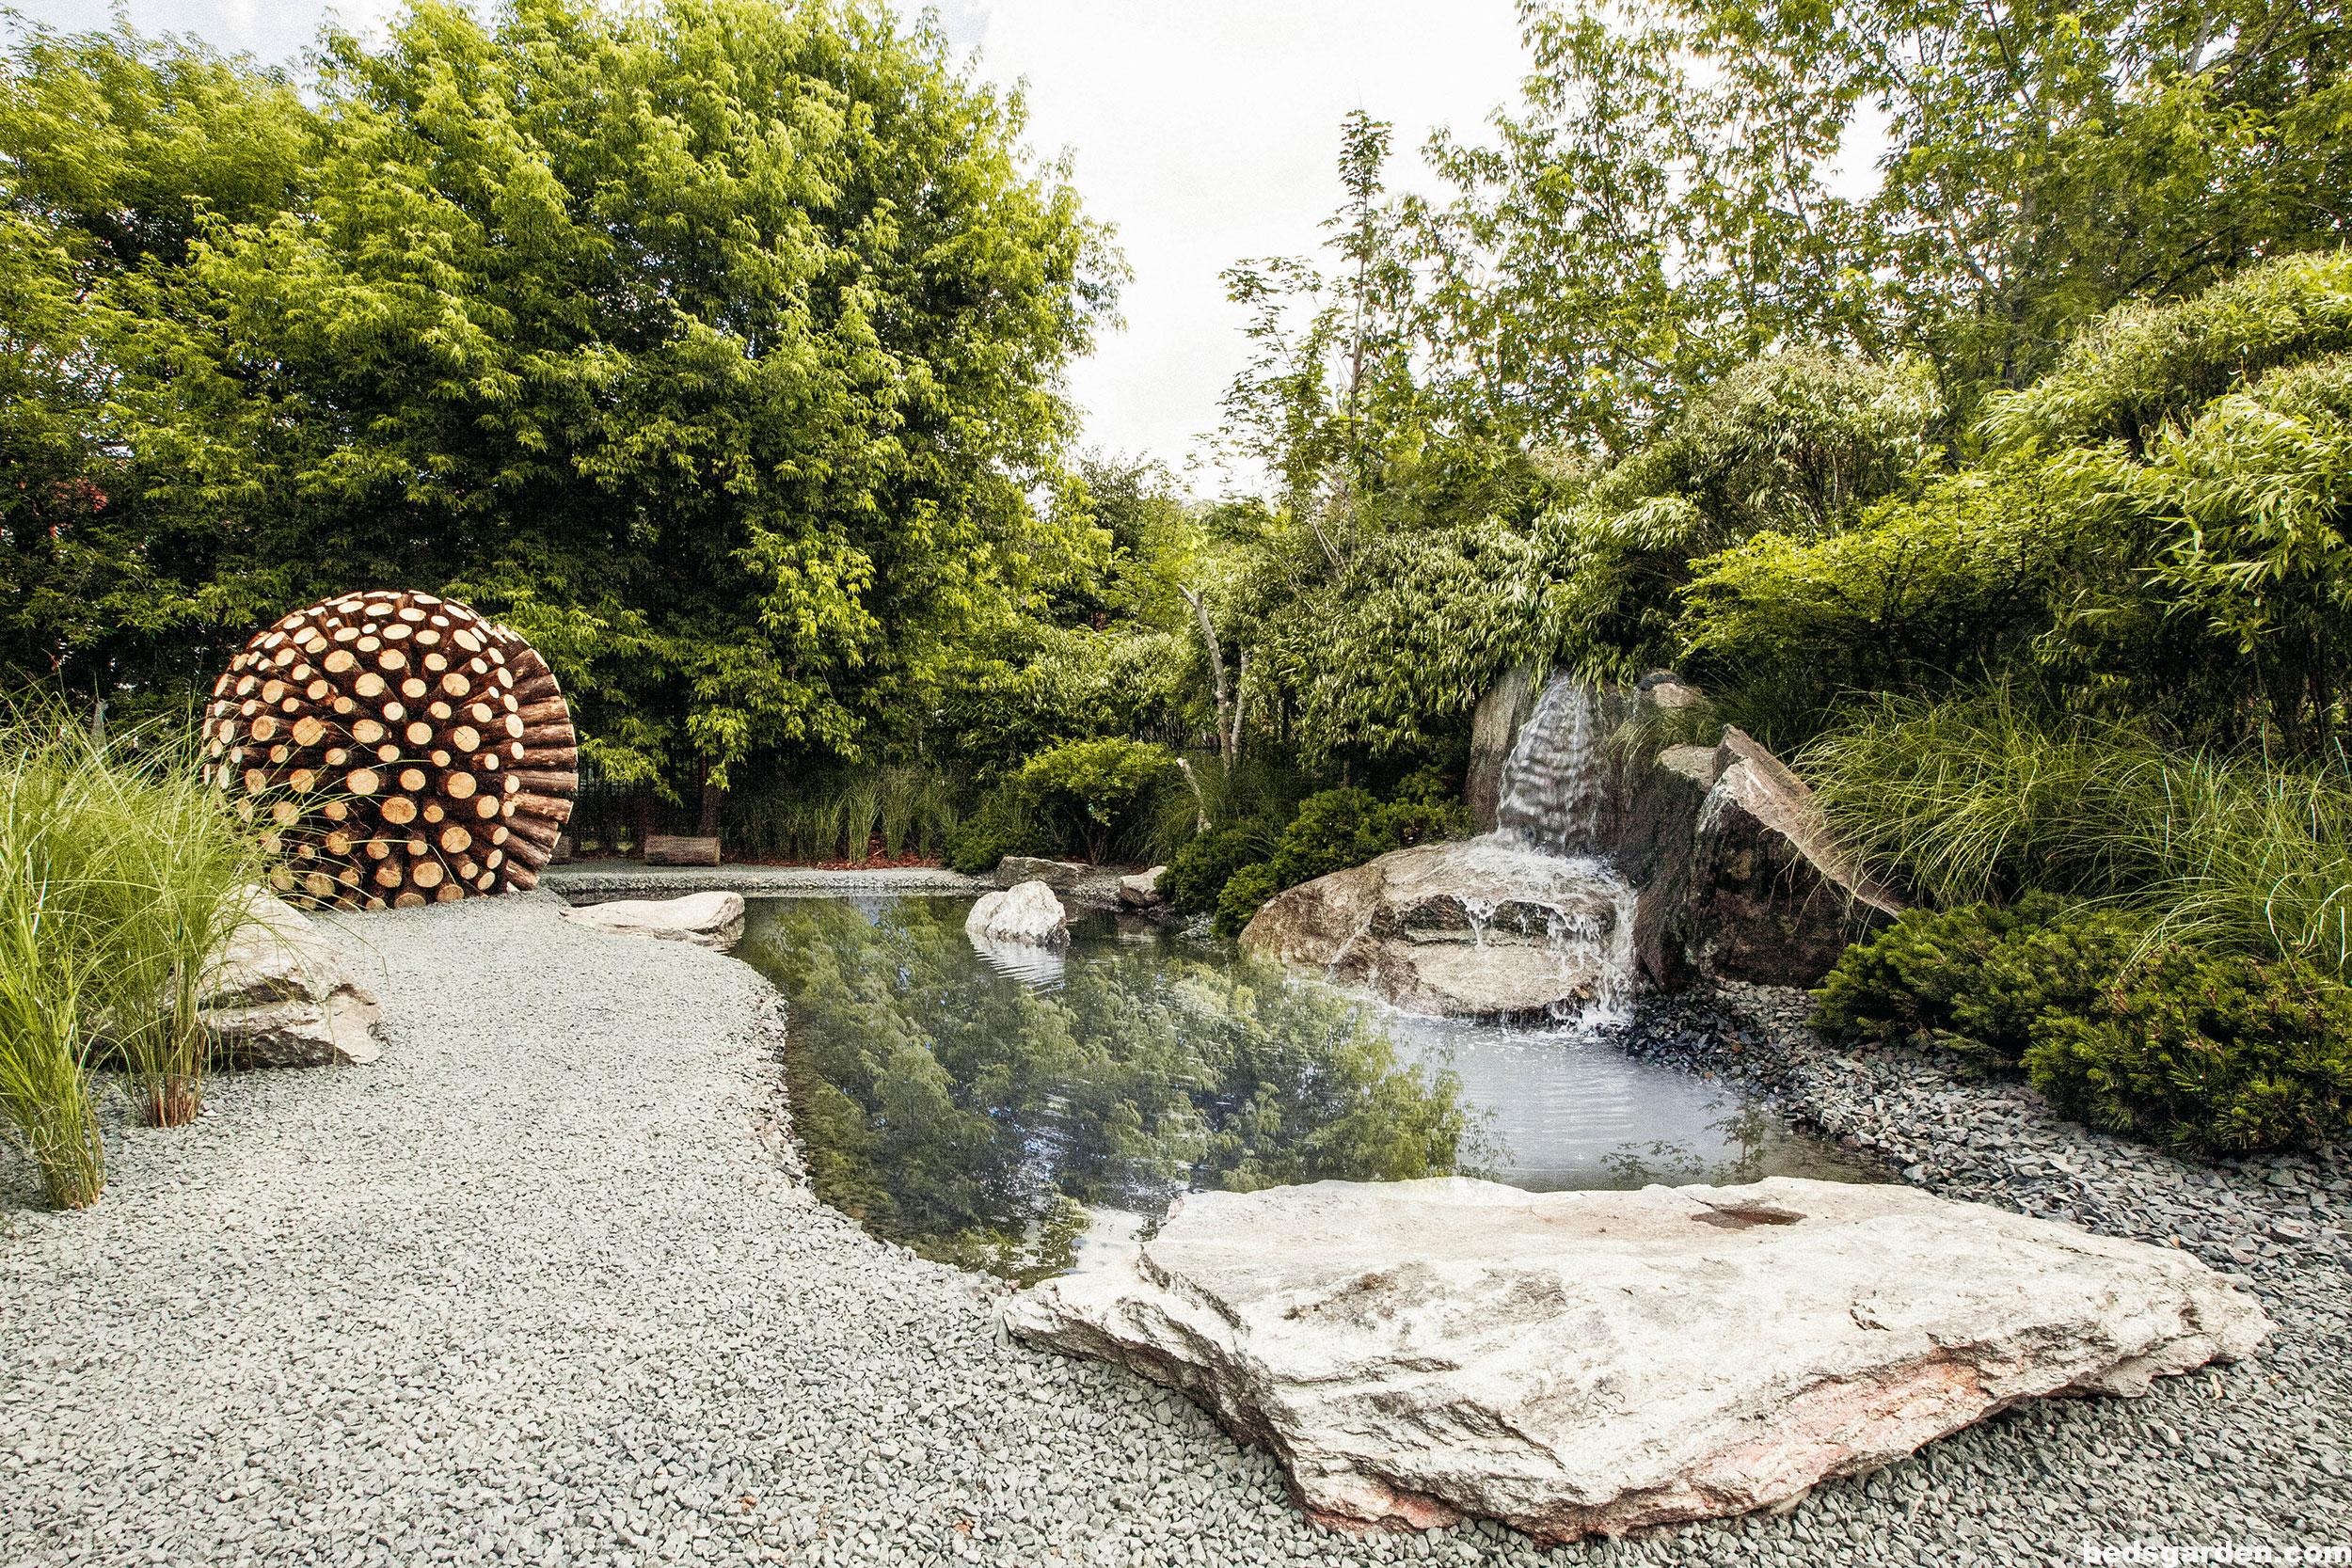
The main elements that make up a zen garden design are rocks and gravel or water. You could also add a statue or other focal point into your design, a bench for relaxing, and plants of course.
Here’s the breakdown of what you need for building a zen garden in your backyard…
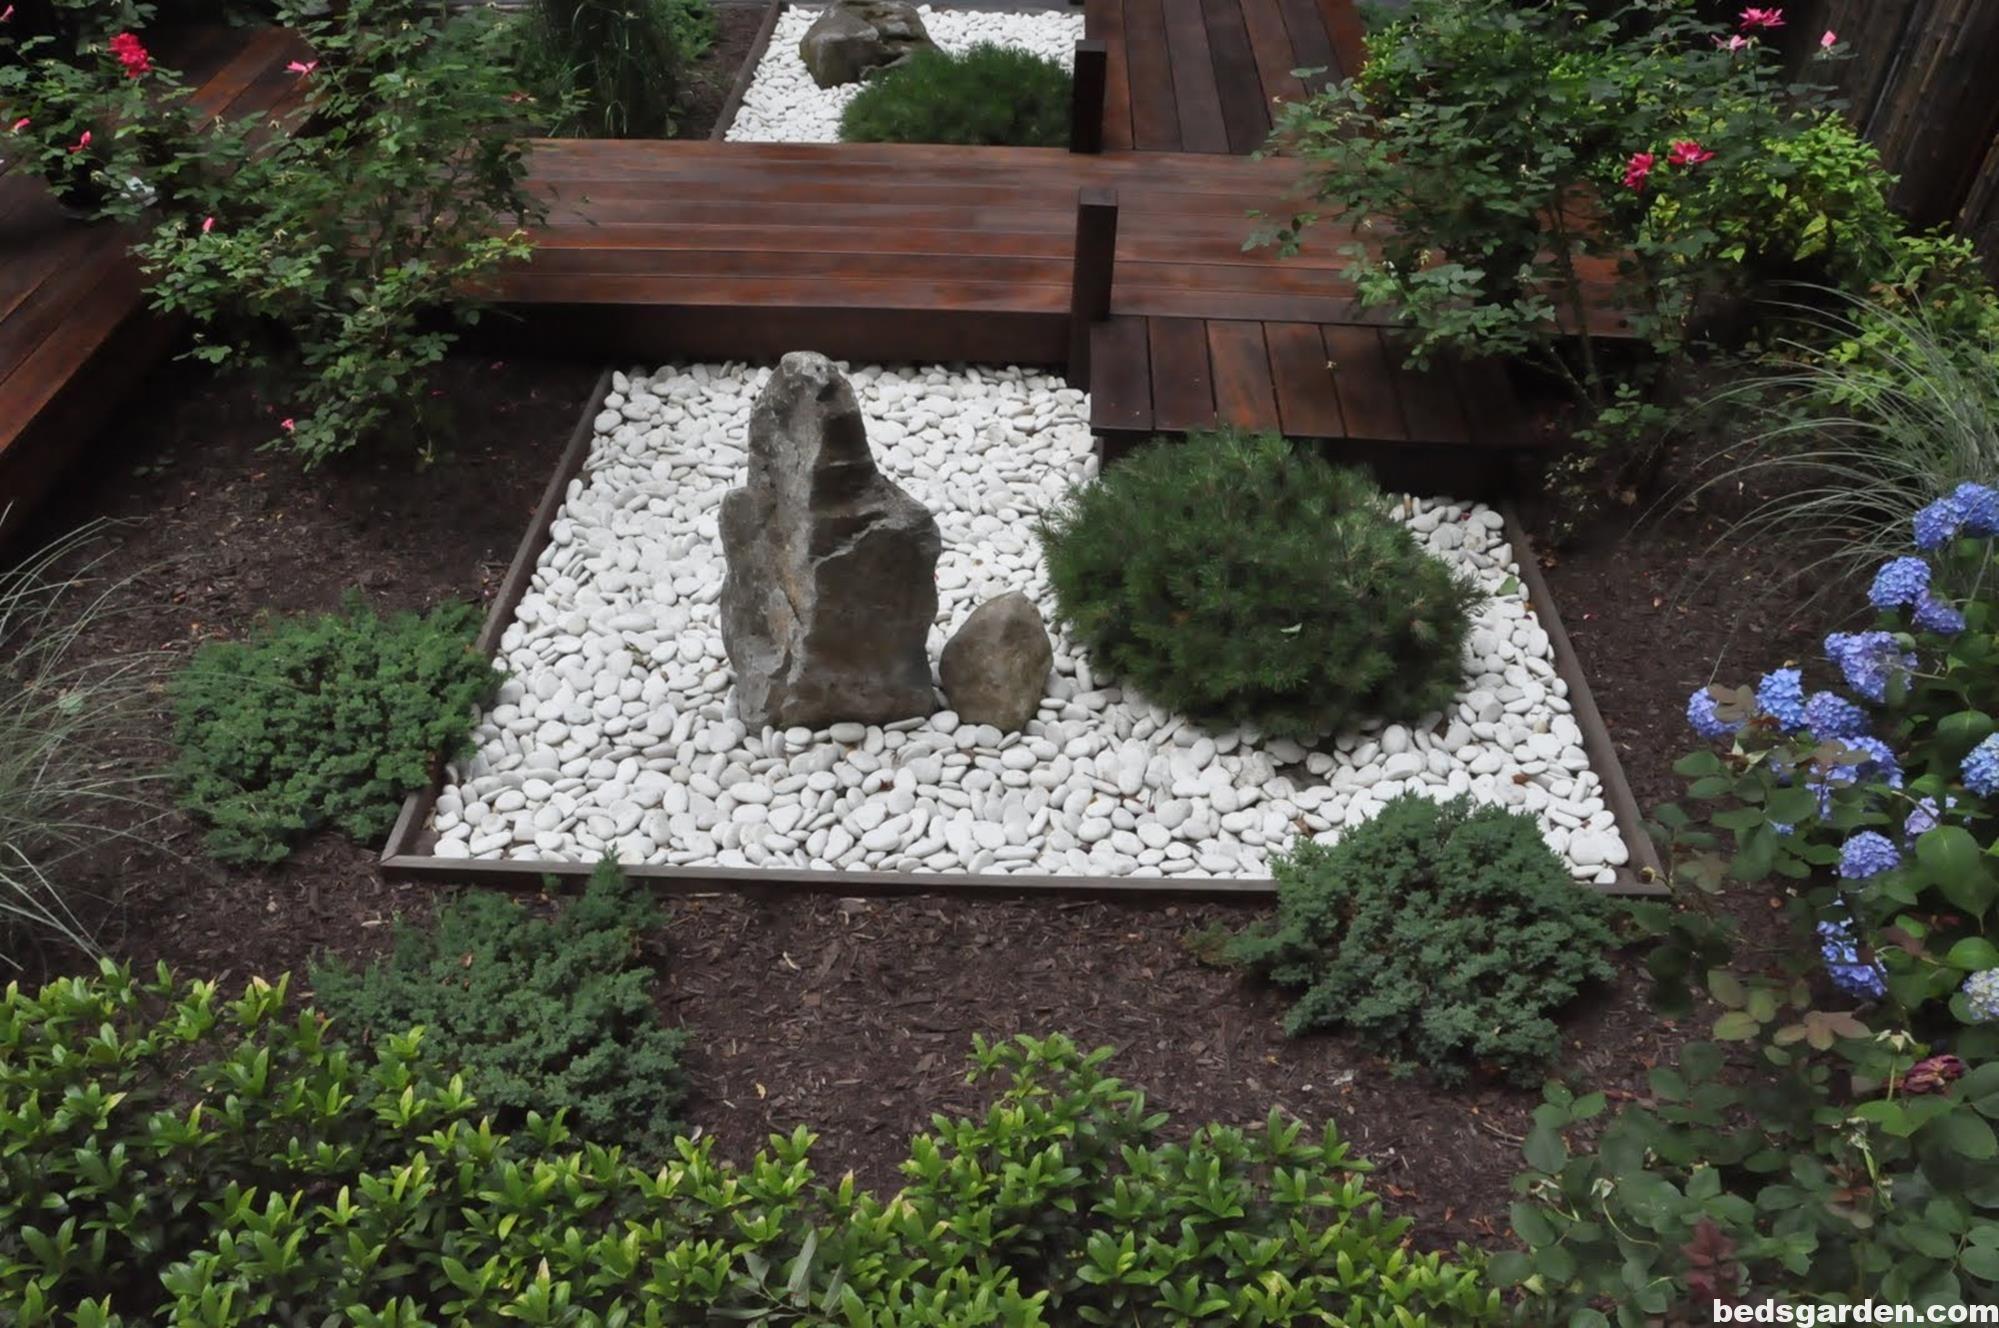
ROCKS OR BOULDERS
Large rocks and boulders represent land and mountains in a traditional zen design. If you have a small area like mine, stick with using rocks and small boulders, so you don’t crowd the space.
I needed a tall element in the corner of mine to cover up some ugly wires and utilities, so I built a large concrete block planter, rather than using large rocks.
Keep in mind that concrete is not something you would normally find in a Japanese zen garden, so I improvised on this part. If you want to make yours more traditional, then use natural stones and boulders, rather than concrete.
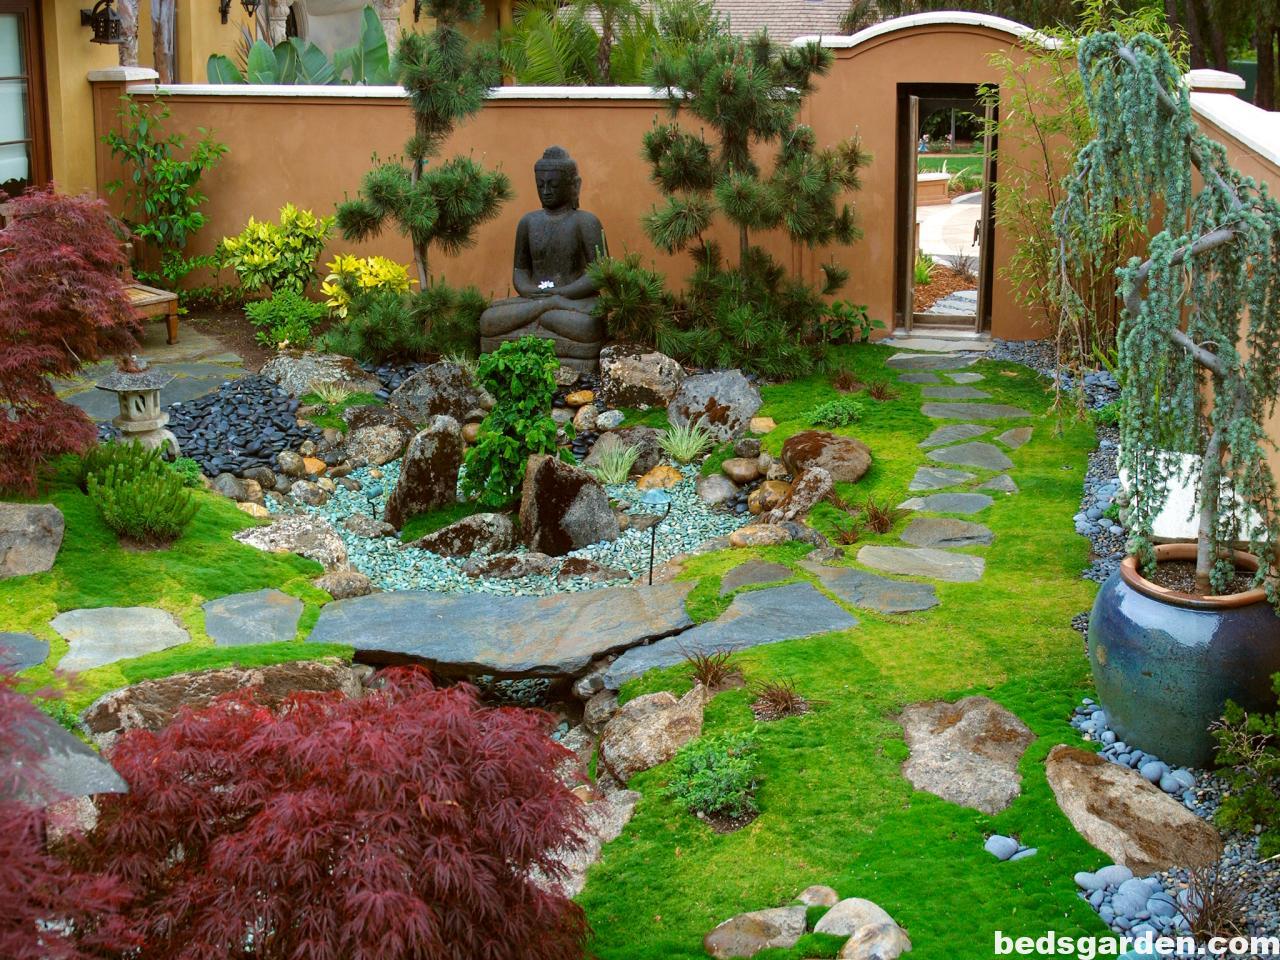
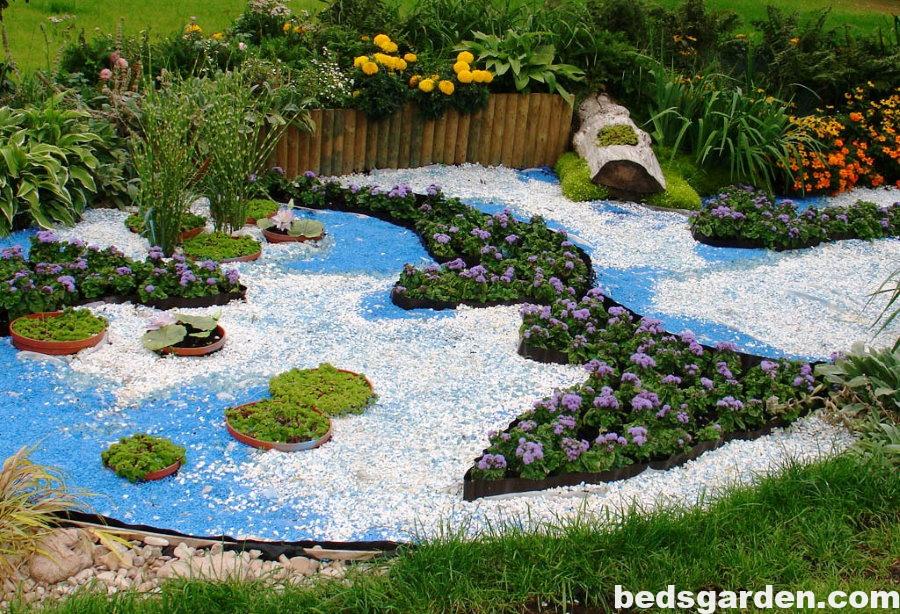
GRAVEL OR A WATER FEATURE
Gravel is used to represent water, but you could use an actual garden water feature instead. You could use sand instead of gravel if you want.
Just keep in mind that sand is lighter weight, so it can blow around in the wind, or wash away if there’s a heavy rain.
If your backyard zen garden is in a protected spot, then sand might work fine. But crushed stone or small pebbles are usually a better choice.
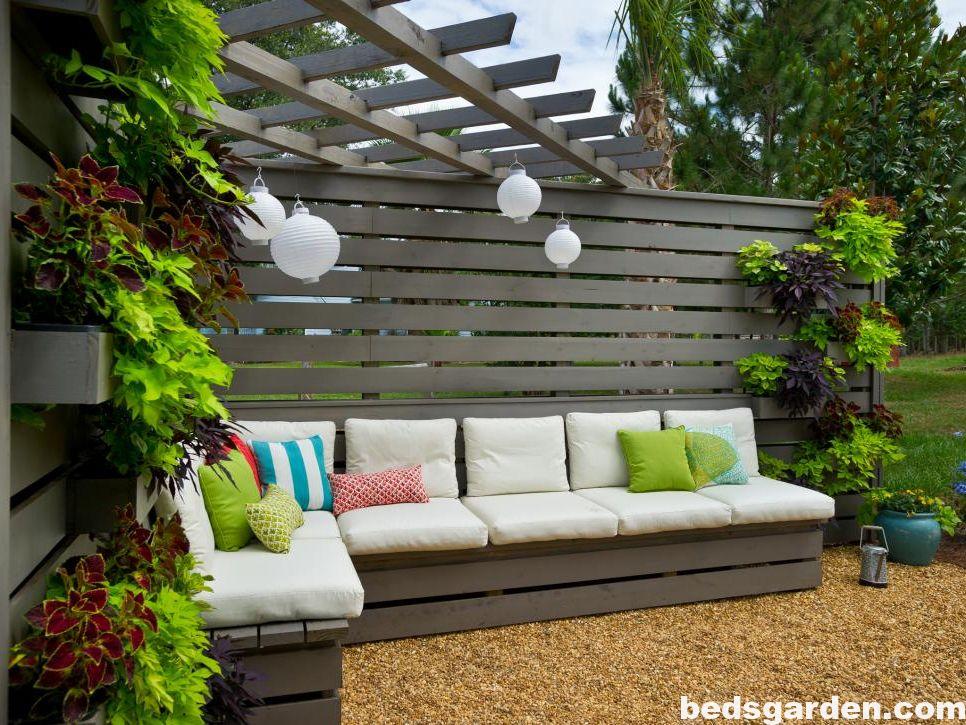
BENCH, STATUE, OR OTHER FOCAL ELEMENT
This part is completely optional. But, if the area is large enough, you can add a sitting bench, a statue, or some other focal element to aid with relaxation and meditation. Totally up to you.
ZEN GARDEN PLANTS
If you want to create a more conventional Japanese rock garden, then skip the plants. Otherwise, choose ones that will work in the space and location.
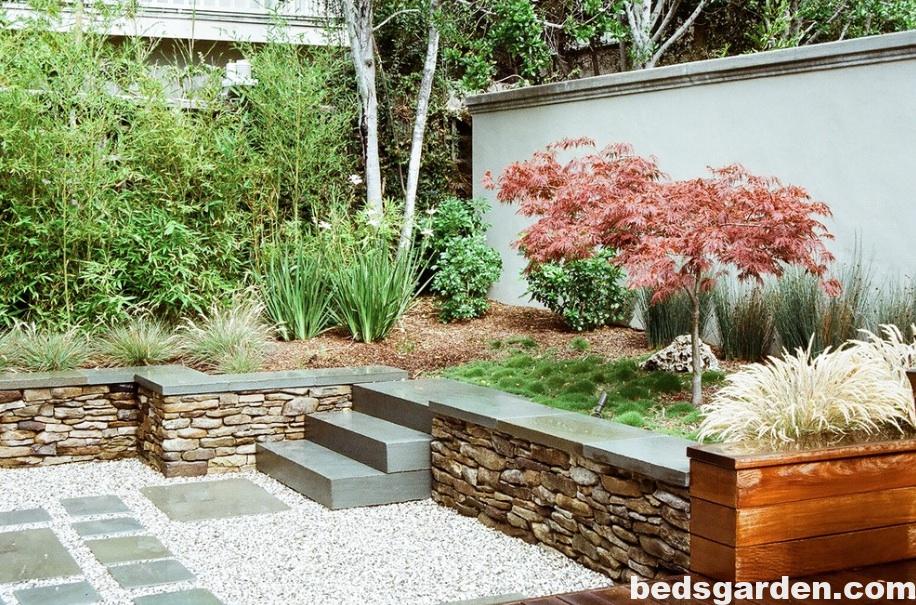
I chose to use hardy cactus and succulent plants, since the area is hot, and dry, and very sunny. I mixed different species in my planter and in the ground.
Succulents are not traditionally used in zen garden design, but I had to improvise here.
HOW TO MAKE A ZEN GARDEN IN YOUR BACKYARD
It’s actually pretty easy to build a small backyard zen garden like mine. Obviously the larger you go, the more complex your project will become. But here are the basic steps to take to build your own zen garden.
Step 1. Clear the space – Once you choose an area, clear away any plants, grass or weeds that are currently growing there. Then rake the soil so it’s flat, and fairly level.
Mine was already surrounded with plastic edging. But you could use rock or some other decorative edgers for yours instead, to keep with the theme.
Step 2. Place larger stones and feature elements
The next thing to do is figure out where all of the largest features of the garden will go. So, if you have boulders, a statute, planter, or bench, figure out the placement of everything.
Sometimes sketching your design on paper will make it easier. But remember, you’re going for simplicity and minimalism here. So try not to add too many elements to your zen garden. Keeping it simple will make this step much easier too.

Step 3 – Add the gravel or a water feature
If you’re using gravel to give the illusion of water in your zen garden, lay it in a curved pattern. Water doesn’t flow straight, so the windier you can make it, the better.
Using gravels gives you the added benefit of being able to rake it and draw flowing patterns to help with meditation, just like in a traditional zen garden.
Otherwise, use an actual water feature instead of gravel. It doesn’t have to be anything fancy, a simple garden fountain would work.
Just be sure to choose something that fits well in the space. If the water feature is too large, it could be overpowering.
Step 4. Add the plants (optional)
If you choose to incorporated plants into your DIY zen garden, you could either put them right into the ground, or add a few potted ones to the space after it’s done.
I chose to do both. I used more plants than you would normally see in a Japanese zen garden, but that’s ok.
It’s fun to follow a theme, but when it comes down to it, you should design it as you like – as long as it doesn’t become overgrown when everything fills in.
Step 5 – Lay smaller stones over the top of the soil
This is the finishing touch, and really pulls your zen garden together.
I used medium sized gray river rock in my garden. I laid each rock flat, and was careful not to create any kind of pattern.
You certainly can create a pattern if you want, or you could lay them vertically side by side instead of laying them flat like I did. Just be sure to cover the soil completely.
That’s it, now you can sit back and enjoy your DIY backyard zen garden. Even if you don’t use it for active meditation, you’ll find that it’s a calming space in your yard. The best part is that it requires very little maintenance.
An outdoor zen garden is great project for anyone who has a trouble spot in their yard where little else will grow. It’s also perfect for those who want a beautiful space where they can relax, meditate, and get their garden zen on.