HOW TO DIY RAISED GARDEN BED COVER TO PROTECT YOUR GARDEN FROM ANIMALS DIY
DIY tutorial on how to build a protective cover with hinges for your raised garden bed to prevent animals from attacking your vegetables.
This DIY garden bed cover with fencing is a beginner friendly project that you can tackle over a weekend, as it doesn’t require fancy tools or skills.
Why do you need a garden bed cover for your raised bed?
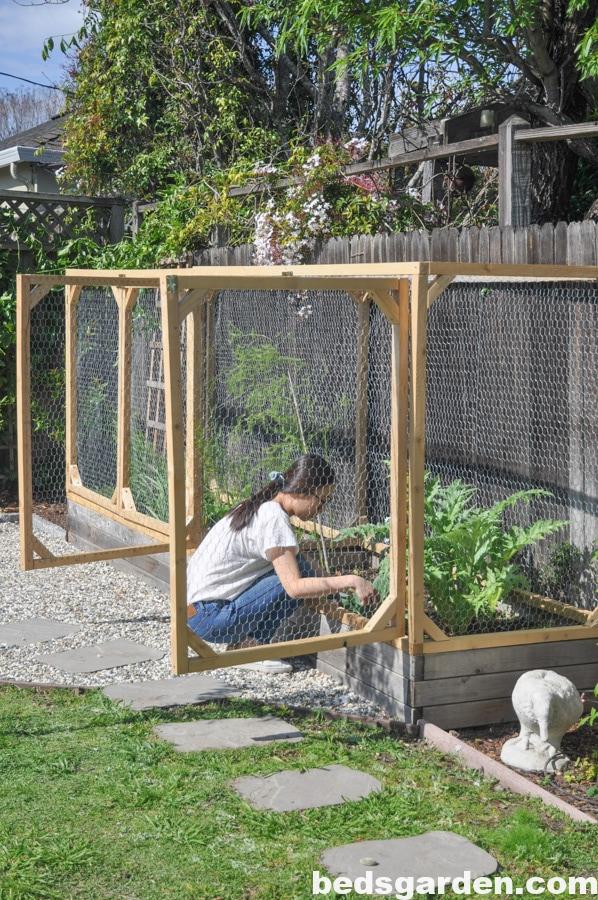
When I first started my vegetable garden on my two raised beds, I didn’t know the importance of having a protective cover for my garden beds.
Soon enough, I noticed a lot of my seedlings and vegetables got chewed up down to the ground. It took me a while to figure out it was the squirrels who ate up all of our vegetable crop.
It’s definitely very discouraging to see that happen so I tried numerous ways to repel the squirrels, such as spraying chili water over my plants, or adding an owl statue, but none of them worked.
This DIY garden
One day I decided to design and build a protective cover for my raised garden beds that will serve as a cage, in the effort to protect my vegetables from small animals.
And I’ms so glad with this DIY garden bed cover! My vegetables are thriving, no more loss of leaves or seedlings!
Now I can grow whatever vegetables and fruits I like without worrying if squirrels like them as well. This DIY garden bed cover will work for other animals as well, such as raccoons, deer, and others.
DIY raised garden bed cover finished dimensions
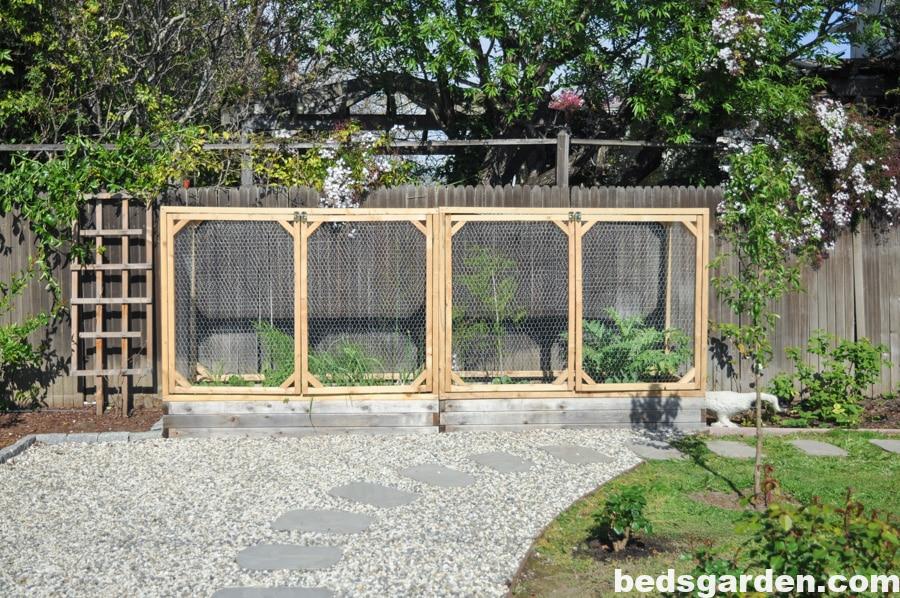
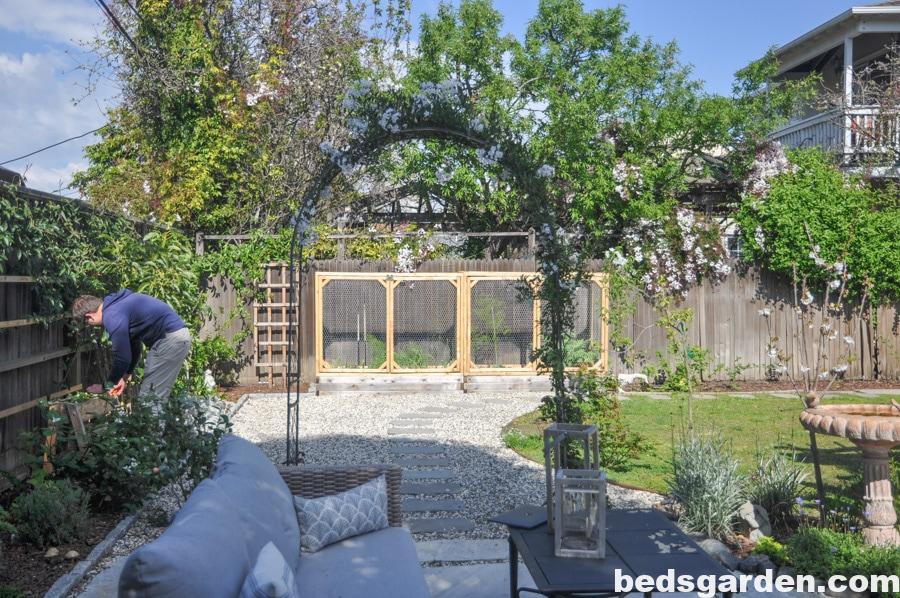
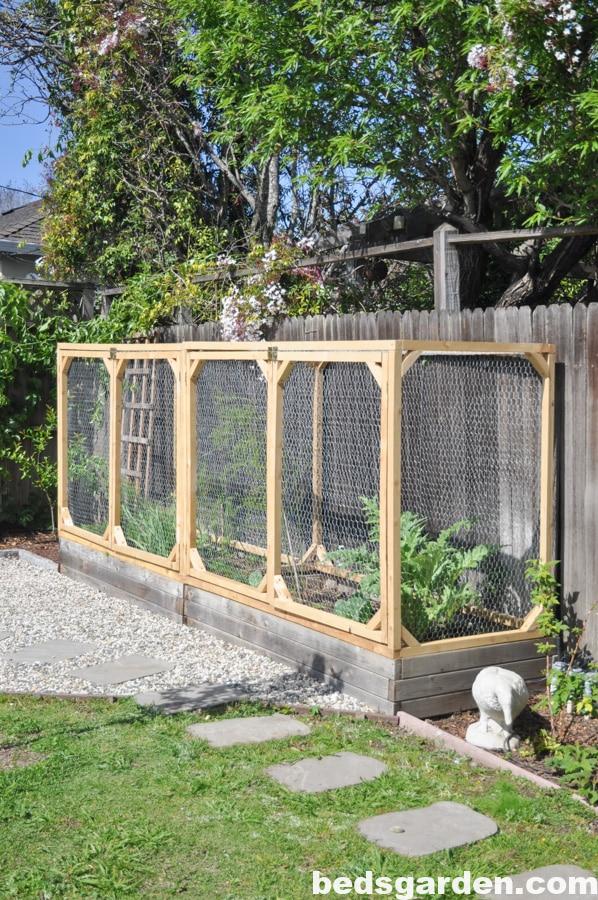
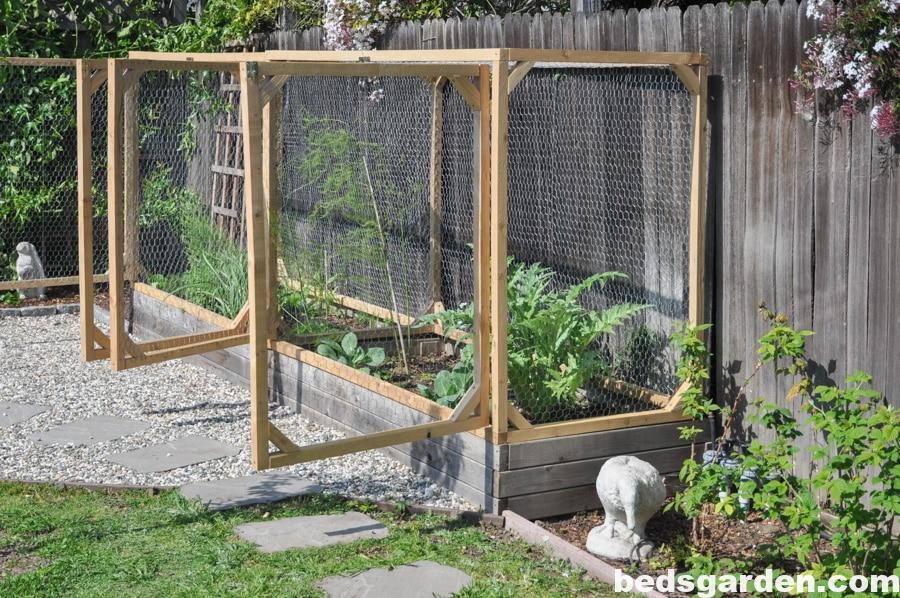
For my garden beds, I have two standard 3′ by 6′ raised beds, similar to this one. The finished DIY garden bed cover is about 6 feet wide, 4 feet tall, and slightly less than 3 feet deep.
Why less than 3 feet deep? There are two reasons:
- I have 1/2″ irrigation tubing sitting on top of the back edge of the raised bed.
- the fence between our yard and our neighbor’s is quite old so the top portion is slightly leaning to our side.
By reducing the depth I’m able to address those two factors.
In terms of deciding this garden bed cover and doors height, I need this protective cover to be fairly tall to account for large plants and vines, such as artichokes, peas, and cucumbers. I landed on 4 feet as the height.
And for construction, each garden cover has a pair of doors, attached to the cover frame with hinges. I also installed two barrel bolt on the top frame to make sure I can close them securely.
Also this DIY garden cover is completely covered by chicken wire for all sides except the bottom.
DIY garden bed cover video
If you are a visual learner, I made a 5-minute video on our process of building this DIY garden bed cover with doors and hinges:
I recommend you watch this video to get an idea on what the whole process looks like, then continue reading for DIY materials and step by step instructions ?
DIY raised bed cover tools and materials
The material listed below are for one 3′ by 6′ raised bed cover:
Exterior grade 2 in. x 2 in. x 8 ft wood board
Chicken wire. I use 3′ wide chicken wire because it matches well with my 3′ by 6′ raised bed. I used 30′ per garden bed cover.
GARDEN FROM ANIMALS

Why do you need a garden bed cover for your raised bed?
It’s definitely very discouraging to see that happen so I tried numerous ways to repel the squirrels, such as spraying chili water over my plants, or adding an owl statue, but none of them worked.
DIY garden bed cover
Now I can grow whatever vegetables and fruits I like without worrying if squirrels like them as well. This DIY garden bed cover will work for other animals as well, such as raccoons, deer, and others.

For my garden beds, I have two standard 3′ by 6′ raised beds, similar to this one. The finished DIY garden bed cover is about 6 feet wide, 4 feet tall, and slightly less than 3 feet deep.
Why less than 3 feet deep? There are two reasons:
- I have 1/2″ irrigation tubing sitting on top of the back edge of the raised bed.
- the fence between our yard and our neighbor’s is quite old so the top portion is slightly leaning to our side.
By reducing the depth I’m able to address those two factors.
In terms of deciding this garden bed cover and doors height, I need this protective cover to be fairly tall to account for large plants and vines, such as artichokes, peas, and cucumbers. I landed on 4 feet as the height.

Also this DIY garden cover is completely covered by chicken wire for all sides except the bottom.

If you are a visual learner, I made a 5-minute video on our process of building this DIY garden bed cover with doors and hinges:
I recommend you watch this video to get an idea on what the whole process looks like, then continue reading for DIY materials and step by step instructions ?
DIY raised bed cover tools and materials
The material listed below are for one 3′ by 6′ raised bed cover:
Exterior grade 2 in. x 2 in. x 8 ft wood board
Chicken wire. I use 3′ wide chicken wire because it matches well with my 3′ by 6′ raised bed. I used 30′ per garden bed cover.
Miter saw to cut the wood
1/2″ spade bit and drill
Wire cutter
2 1/2″ Exterior screws
Stapler. You can choose a electric stapler to save some elbow grease
Stainless steel staples (exterior grade)
Brass hinges x 4 (exterior grade)
Brass barrel bolt x 2 (exterior grade)
DIY raised garden bed cover instructions
Here’s the diagram I created in SketchUp. This shows how the pieces attach together.
For my 3′ by 6′ garden bed (similar to this raised bed), I cut 2 by 2 boards to the following size:
Note that I leave 1″ out from the depth because I have irrigation tubing sitting on the back edge of the raised bed. You might need to adjust the number based on your situation.
Each cover should be customized for your garden bed, I would encourage you to draw a diagram on paper or SketchUp, to determine the size you’d like to cut. BED COVER TO PROTECT YOUR GARDEN FROM ANIMALS
DIY RAISED BED COVER PROJECT CUT LIST
Frame: (4) * 73″; (4) * 32″; (4)*48″
2 doors: (4) * 31.5″; (4) * 47.25″
STEP 1. CUT 2IN X 2IN X 8FT BOARDS TO SIZE.
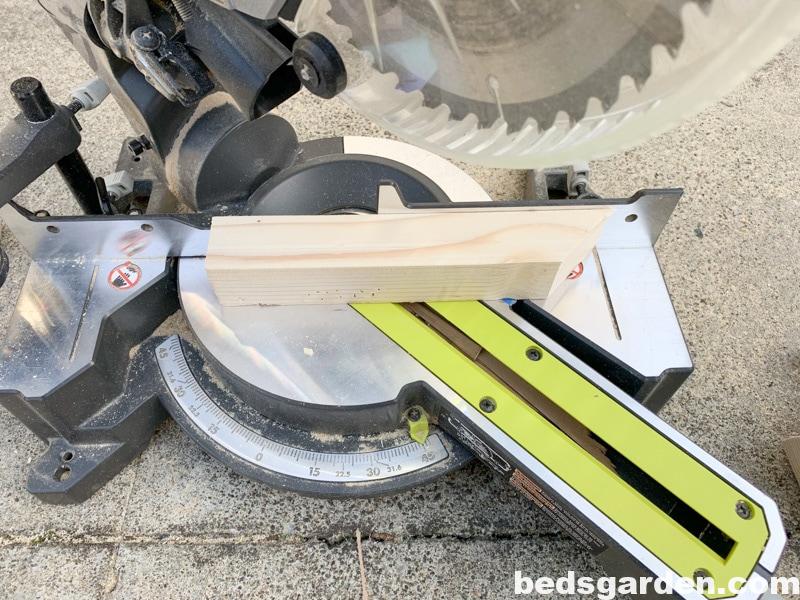
You’ll need to cut those 2×2 boards into two type of pieces, one for building the garden cover frame structure, the other for diagonal braces to support the structure.
All the frame structure pieces are straight cut. All braces are 45 degree diagonal cut.
One trick to quickly produce the braces is to align the board to a point on your miter saw (you can use tape to mark it), and flip it back and forth between cutting. In my case, I used the line(right) on my miter saw to align the 2×2 boards.
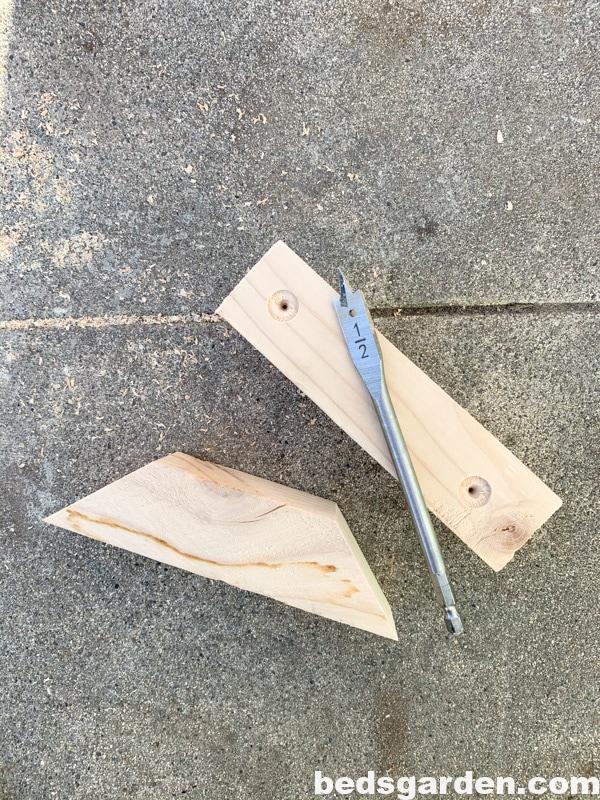
To prepare the diagonal braces, I used 1/2″ spade bit to create a dent on each side, about 1″ from the edge. I have used spade bit quite a lot for counter sink screws.
STEP 2. BUILD GARDEN COVER FRAME STRUCTURE.
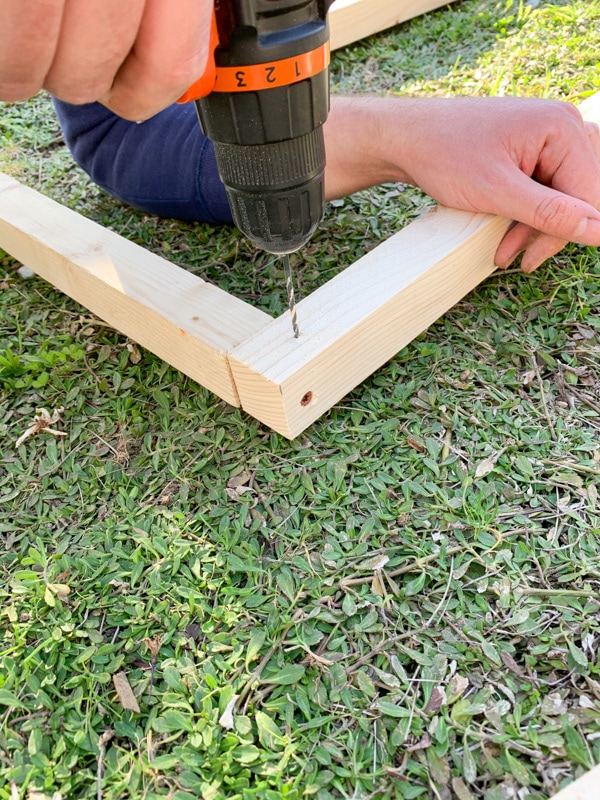
Now moving onto assembling the garden bed cover. For each connection, we drill a pilot hole and then screw in the 2″ exterior wood screw.
You’ll want to choose exterior grade screws because they won’t rust and deteriorate your raided bed protective cover.
Also, drilling pilot holes is important for this project as without them the wood will tend to split while you attach them.
If you have a pocket hole jig, use it as it will make your life a lot easier.
We didn’t own a pocket hole tool back then, so we used two screws per corner where three 2×2 boards meet. We drilled each hole around 1/3 of the way instead of the exact center, that will give the second screw some space to pass through.
HOW TO DIY RAISED GARDEN

Why do you need a garden bed cover for your raised bed?
One day I decided to design and build a protective cover for my raised garden beds that will serve as a cage, in the effort to protect my vegetables from small animals.
And I’ms so glad with this DIY garden bed cover! My vegetables are thriving, no more loss of leaves or seedlings!
Now I can grow whatever vegetables and fruits I like without worrying if squirrels like them as well. This DIY garden bed cover will work for other animals as well, such as raccoons, deer, and others.

DIY raised garden bed cover finished dimensions
For my garden beds, I have two standard 3′ by 6′ raised beds, similar to this one. The finished DIY garden bed cover is about 6 feet wide, 4 feet tall, and slightly less than 3 feet deep.
Why less than 3 feet deep? There are two reasons:
- I have 1/2″ irrigation tubing sitting on top of the back edge of the raised bed.
- the fence between our yard and our neighbor’s is quite old so the top portion is slightly leaning to our side.
By reducing the depth I’m able to address those two factors.
In terms of deciding this garden bed cover and doors height, I need this protective cover to be fairly tall to account for large plants and vines, such as artichokes, peas, and cucumbers. I landed on 4 feet as the height.

And for construction, each garden cover has a pair of doors, attached to the cover frame with hinges. I also installed two barrel bolt on the top frame to make sure I can close them securely.
Also this DIY garden cover is completely covered by chicken wire for all sides except the bottom.

DIY garden bed cover video
If you are a visual learner, I made a 5-minute video on our process of building this DIY garden bed cover with doors and hinges:
DIY raised bed cover tools and materials
The material listed below are for one 3′ by 6′ raised bed cover:
Exterior grade 2 in. x 2 in. x 8 ft wood board
Chicken wire. I use 3′ wide chicken wire because it matches well with my 3′ by 6′ raised bed. I used 30′ per garden bed cover.
Miter saw to cut the wood
Wire cutter
2 1/2″ Exterior screws
Stapler. You can choose a electric stapler to save some elbow grease
Stainless steel staples (exterior grade)
Brass hinges x 4 (exterior grade)
Brass barrel bolt x 2 (exterior grade)
DIY raised garden bed cover instructions
Here’s the diagram I created in SketchUp. This shows how the pieces attach together.
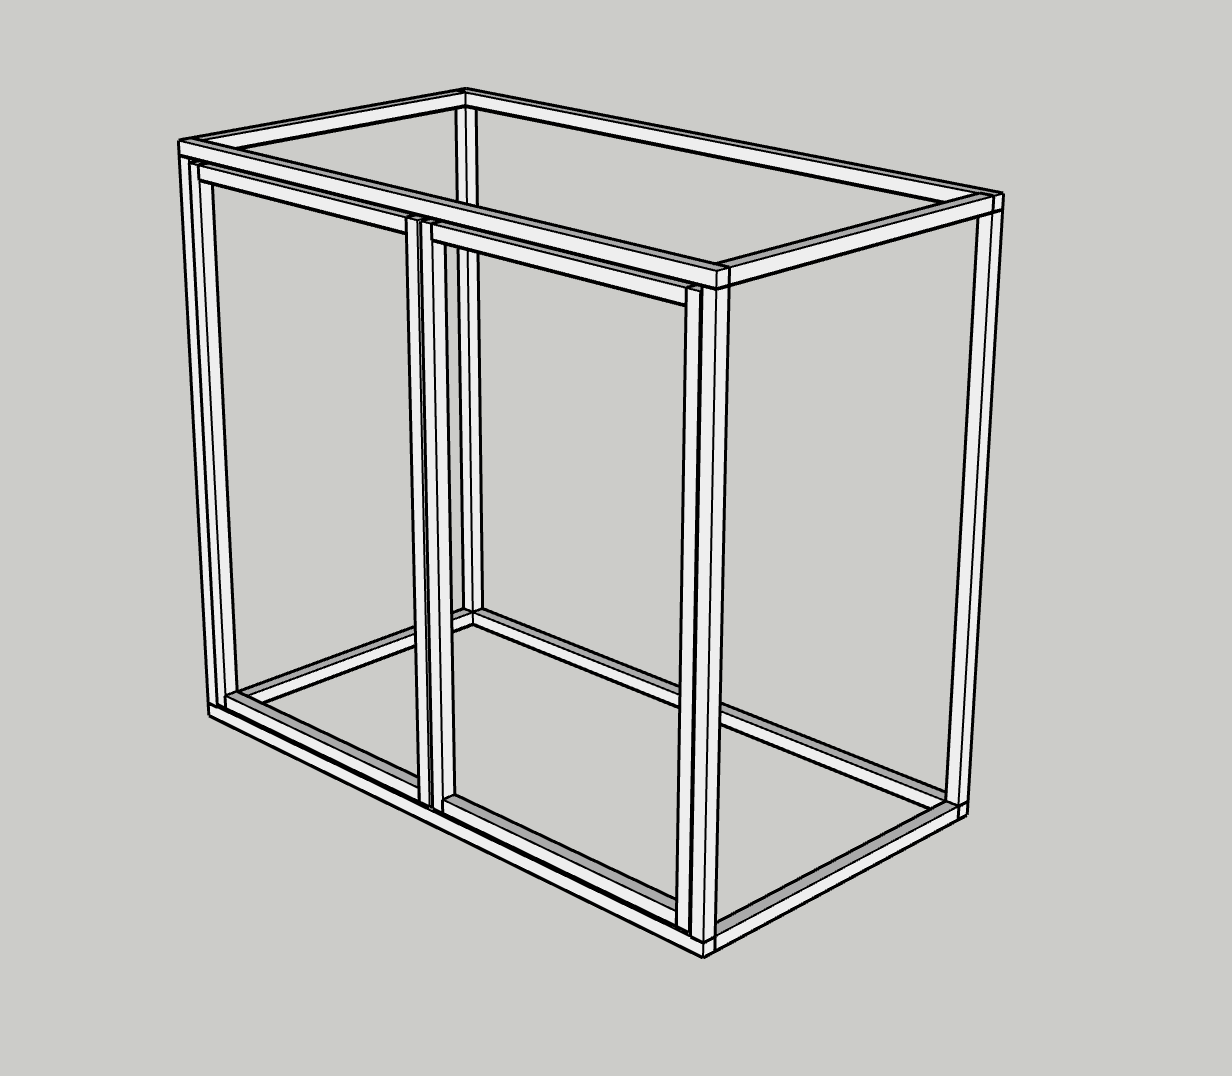
Note that I leave 1″ out from the depth because I have irrigation tubing sitting on the back edge of the raised bed.
You might need to adjust the number based on your situation.
Each cover should be customized for your garden bed, I would encourage you to draw a diagram on paper or SketchUp, to determine the size you’d like to cut.
DIY RAISED BED COVER PROJECT CUT LIST
Frame: (4) * 73″; (4) * 32″; (4)*48″
2 doors: (4) * 31.5″; (4) * 47.25″
STEP 1. CUT 2IN X 2IN X 8FT BOARDS TO SIZE.
You’ll need to cut those 2×2 boards into two type of pieces, one for building the garden cover frame structure, the other for diagonal braces to support the structure. PROTECT YOUR GARDEN FROM ANIMALS
All the frame structure pieces are straight cut. All braces are 45 degree diagonal cut.
One trick to quickly produce the braces is to align the board to a point on your miter saw (you can use tape to mark it), and flip it back and forth between cutting. In my case, I used the line(right) on my miter saw to align the 2×2 boards.
If you have watched the video above, you’ll know what I’m talking about. This way you will be able to produce a lot of those pieces in a short amount of time, also they will be exactly the same size without pre-measuring.


Also, drilling pilot holes is important for this project as without them the wood will tend to split while you attach them.
If you have a pocket hole jig, use it as it will make your life a lot easier.
We didn’t own a pocket hole tool back then, so we used two screws per corner where three 2×2 boards meet. We drilled each hole around 1/3 of the way instead of the exact center, that will give the second screw some space to pass through.
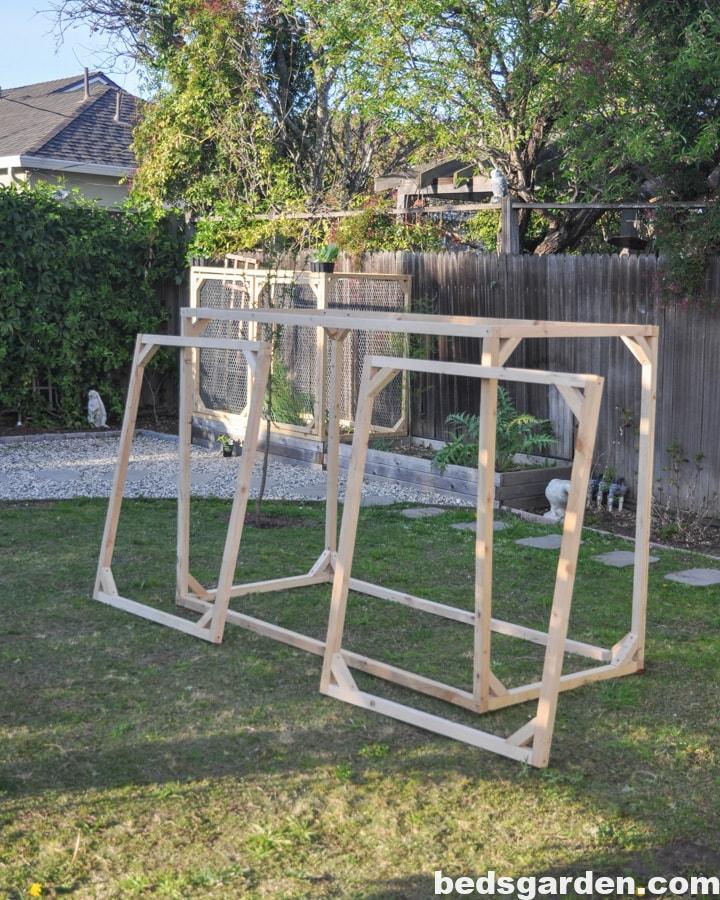
1. the front side. You want to leave it open so you can add doors.
2. the bottom side. This is to maximize the planting area of you garden bed without blocking the soil. Also the bottom side of the garden cover is just sitting on top of the raised bed, not really holding any weight by itself.
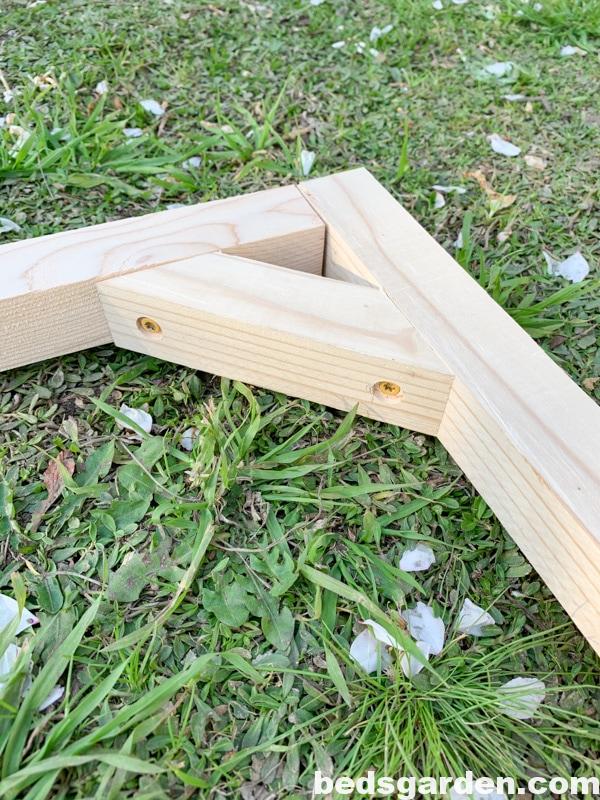
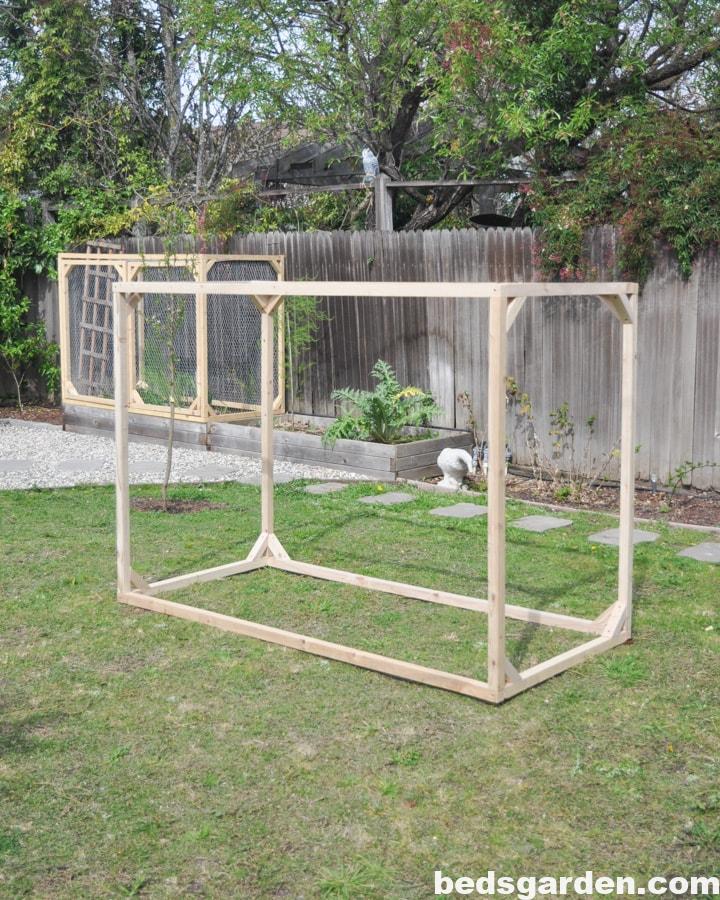
We started by building the back side first, reinforced it with braces on four corners, then move to the front side. Note for the front side of the garden bed cover, that you’ll want to skip reinforcement to leave space for doors.
It’s recommended to dry fit your frame on top of your raised bed to make sure the cover fits well.

After assembly, you should have the basic frame structure of the garden bed cover and a pair of doors. For each door, we have all four corner reinforced with the braces. Now you are ready to attach chicken wire, which is also called poultry netting.
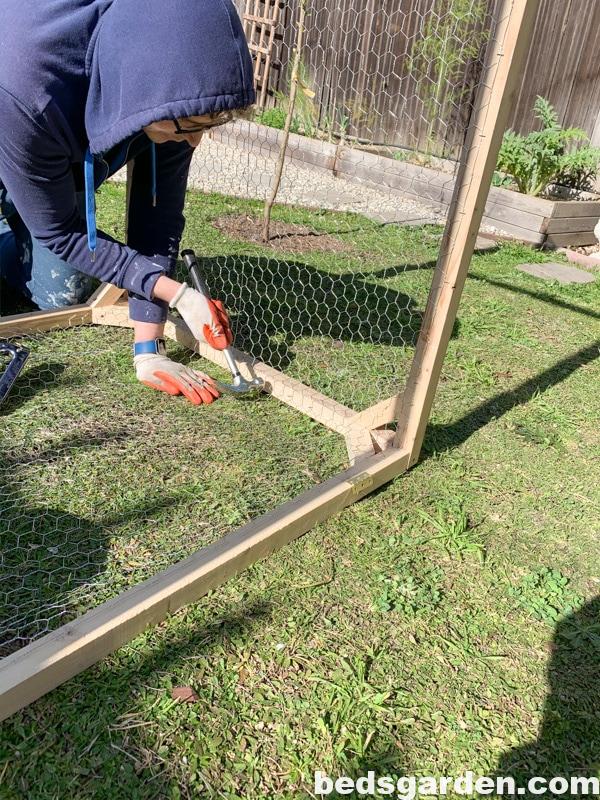
To handle chicken wire, wear gloves to protect your hands. Note the main animals I’m trying to deter are squirrels and mouse, if your garden animal have stronger teeth, consider using garden fence such as this one.
Because my raised bed is 3′ deep, I’m able to lay 3′ wide chicken wire along three sides of the frame continuously without cutting it – from one side to top, then to the other side.
To attach chicken wire, we used stainless steel staples to make it weather resistant.
We used a manual stapler because it is cheaper, but you can use electric stapler as it will make your life a lot easier.
Most of the time the staples won’t go all the way in the wood (at least for our manual one), so we used a hammer to hammer them in more for security.
Trim the excess chicken wire with a wire cutter.
Although both chicken wire and my raised bed is 3′ wide, there will be some extra chicken wire hanging out. I cut them and bent them with a plier to remove the sharp edge.
I went into detail in the video on how I dealt with sharp edge after cutting it.
STEP 4. INSTALL HINGES AND BARREL BOLTS
Now attach hinges and barrel bolts. I used brass ones because they are more weather resistant than some other materials.
To ensure doors open widely, I unfold the hinge to its openest position, and marked the holes on the frame. Then drill and attach the hinge to the frame. I used 4 hinges per garden bed cover (2 for each door).
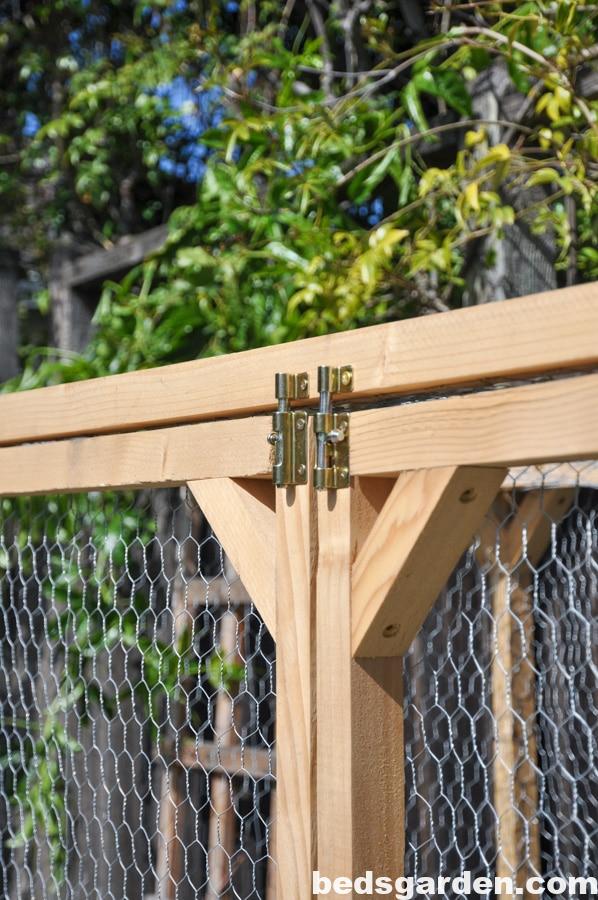
Once the doors were attached. I installed the brass barrel bolts, one per door.
I placed the longer part of the barrel bolts on the door because there’s more vertical space.
STEP 5. ATTACH GARDEN BED COVERS TO YOUR RAISED BEDS
To attach the protective covers to raised garden beds, I simply let the cover sit on the raised bed structure.
STEP 6. TEST, TWEAK, AND ENJOY YOUR DIY GARDEN BED COVER
That’s all the steps for this DIY garden cover and you made to the end, well almost! Now I’d suggest you to test our the doors and hardwares, making sure everything function well.